Saturday, July 30, 2016

sweet wishes


Hi everyone, Thanks for stopping by.

Today I am Sharing with you a card I made for a baby shower  for a dear friend.


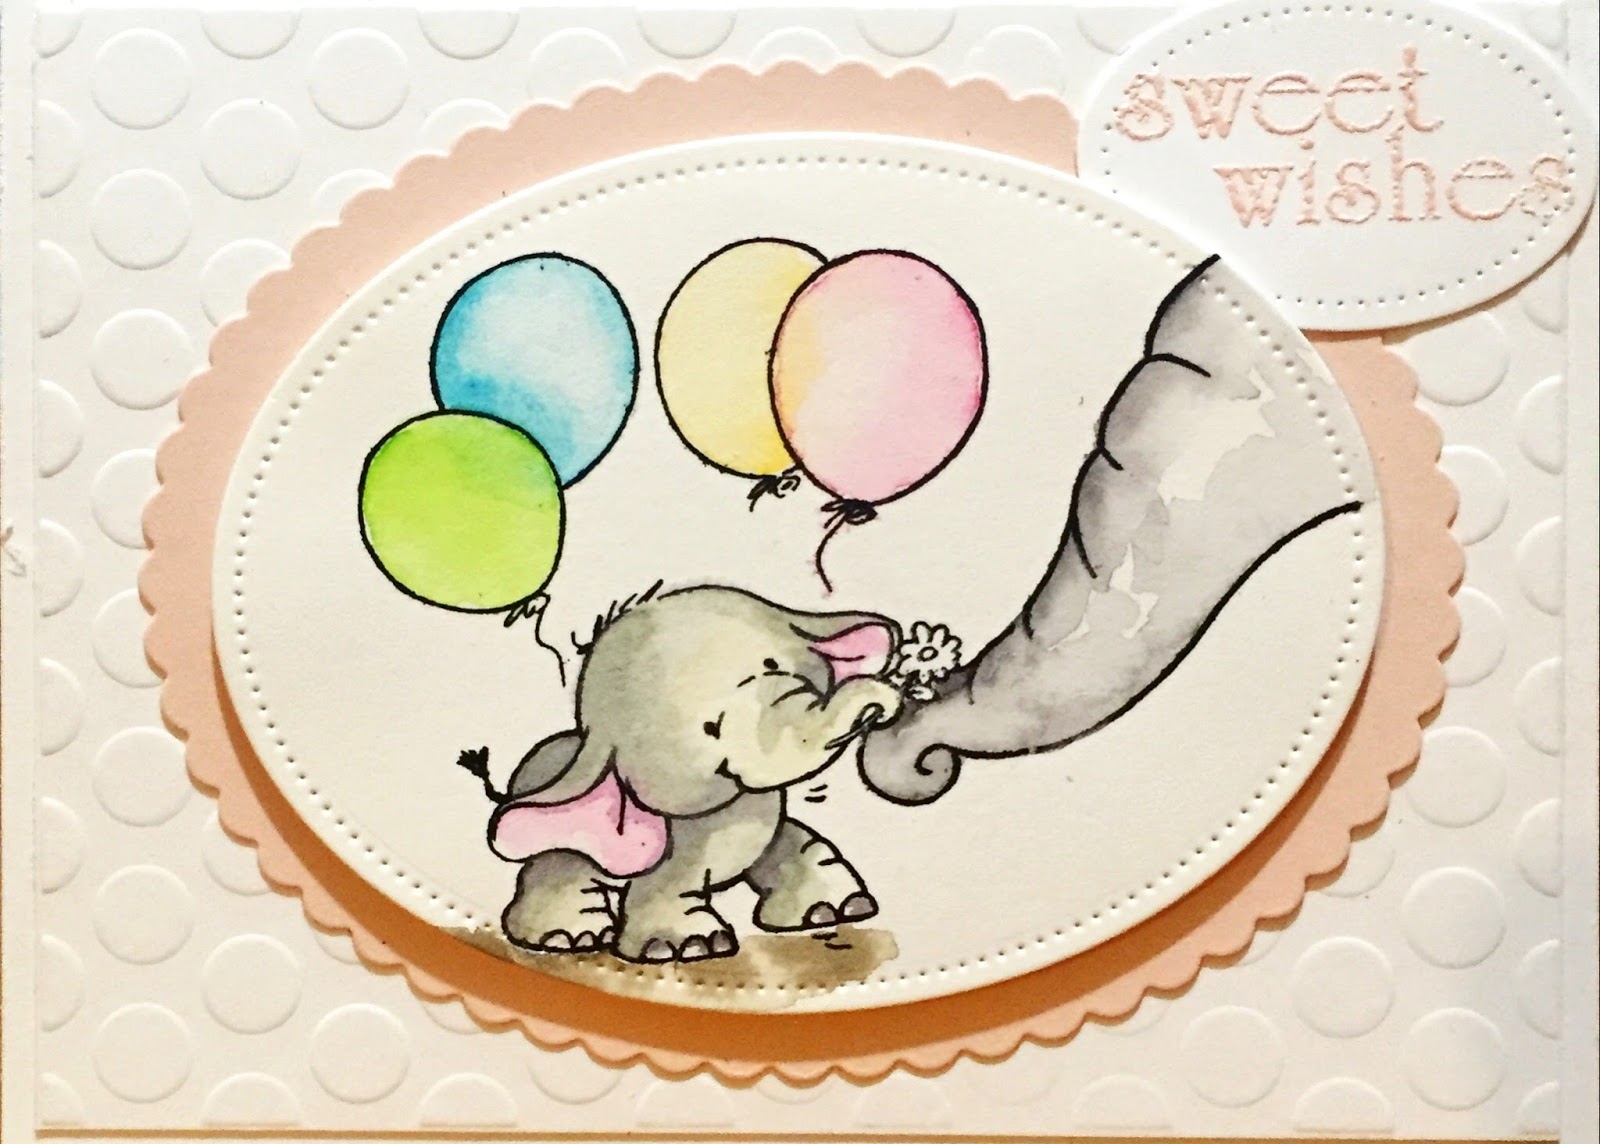
I really love this stamp and i wanted to keep the look soft. I have coloured the stamped image with watercolours and as I wanted to keep thins soft i have left a lot of white space.

To add depth and texture I have Embossed the background with an embossing folder seeing spots.

The sweet wishes wording has been embossed with a soft pink embossing enamel. all the elements have been layered up and some are set on foam tape.

die cut shapes :  Avery Elle Sweet scallops

thanks for having a look!

Don't forget to stop into the store and have a look at these goodie as well as much more, but remember you need to pre-order them.


Mandy x

Monday, July 25, 2016

Flying High

Hi, Lou here today to share a birthday card with you, made with wonderful products from Bizzy Bec's Store.

I had loads of fun with this card, although there was a touch and go moment which I will tell you about shortly...


I started with a 6x6 base which i then sponged with dye ink to make the sky background.
I then stamped Ramona and her teddy by Stamping Bella on to Neenah Heavy Weight Cardstock with memento ink.  I then coloured up my image with my promarkers, and here came the touch and go, the blue part was originally pink, but when I had finished the image I realised how hideous the pink looked with the rest of the colours so I coloured over it with blue markers.  Luckily it turned out ok :)
I then fussy cut the image and put aside.
Next I cut my Memory Box Puffy Clouds and Lawn Fawn Stitched Hillsides.  I inked the edges on the hills to give them some definition.
I then stuck everything down on the inked card base and drew a frame in with white pen.
Then I decided it needed a sentiment so I embossed Happy Birthday with Lawn Fawn Big Scripty Words.
I hope you get a little inspiration to make a scene of your own on a card.
Lou

Friday, July 22, 2016

sending love

Here is my card using 
Stampingbella...sending you lots of love  stamp
coloured with copic markers.

Stamped with  "Ranger Archival Ink". 


My background paper is a canvas sheet cut to size
then sprintzed with dylusion sprays. [calypsol teal]

My heart was cut using Memory Box stitch heart die

Flowers  were also added

Tuesday, July 19, 2016

Hi from Bella the Elephant

Hello Fellow Crafters.

Today I would like to share my latest card with you.


The items used were:
Wild Rose Studio Stamps - Bella with daisy
Spellbinders - Labels Eighteen
Leane Creatief Dies - Border (I doubled)/ Corner Curve


Memory Box - Looping Rings  Bec has other rings on her site.
The "hi" came out of the Sizzix Framelits Die - Regal Stand up Cards 
The papers were a gift from Bizzy Bec's with one of my orders.
Don't forget to get your card entered in this months challenge.

Friday, July 15, 2016

Shaker Card + Elizabeth Crafts Happy Birthday Die

Hi Shaz here!
Another tutorial - shaker cards using positive and negative of a word die -  happy birthday die! Two cards for the price of one!
The **Elizabeth crafts Happy Birthday word die, a stunning die, very easy to use positive and negative.  Also using ** Cottage Cutz Stitched ovals.
Step 1: Die cut out the centre of the shaker card with die cut of choice. On underside add the acetate for the shaker bits to go under. OPTIONAL: on top put a frame cut from same size oval and next one up and mount with double sided mounting tape, cut to size and pop it up on the outside. see below.
Step 2 Completed front layer of card, ready with acetate, frame + embossed front sheet.
Step 3: Add double sided tape to back of *inky glossy card piece for word die *(more details on it on my blog post).
Step 4:
After cutting out the word die add the sheet of photo paper to snippet of white card. Carefully lift off the positive of the word die to expose the intact negative of the die on lower layer.
I have cut another word die cut out of white craft foam (added double sided tape on the back of it also), for the happy birthday die.
Lay the positive layer on top of foam cut so it pops up nicely on the card.
Step 5: I decided I needed to match the colours of the die cut with the background for shaker, so really mixed media here! Some torn up tissue paper, glued on scrap of card, coloured with similar toned sprays.
Step 6: Here are all the shaker elements in the inside of the foam layer, it was die cut with inside size die and then adhered with tape and non tacky glue to the back. I say non-tacky cos tacky glue can stick to sequins etc.
Step 7. Add seal on back of shaker, I used some anti static powder on back of the acetate, before adding sequins etc. The seal on back of foam needs to be complete before turning it over.
Completed card 1, also used embossing folder by *Taylored Expressions called Snow fall, *available from Bec.- although not on site. I actually embossed it from both ends to extend the embossing.
Card 2: You probably can't see it but used *Spellbinder Pierced Rectangles die set to cut out the photo paper. Just used the pierced section to give a pierced edge.
Thanks so much for popping over for a peek and chat. You really are all appreciated I do hope this has been a help to you.
Shaz in Oz.x

Sunday, July 10, 2016

Once Upon a Time - Roses...

Hi Karen here, today I am popping in to share with you my new card.

I have been playing again with the Blue Butterfly Digi Stamps from the store.  I have been wanting to enlarge one of the girls faces for a while now.  The image I choose is from the Once Upon a Time Collection and is called Roses.  You can find her and her friends here.


She has been coloured with Copics and Prisma Pencils and was such fun to colour.  I have also used Card Embellishment Kit No. 8 and she has been printed onto Copic Paper (Bec has a similar product in store Neenah Cardstock) and  then die cut with Spellbinders Nestabilities die - Fleur De Lis Squares.  The sentiment is a freebie and available here from the store blog.

The stocktake sale is still on but only for a limited time so drop by the store for all your crafty needs.

Until next time, Happy Crafting.

Karen 

Tuesday, July 5, 2016

July Challenge....


Bizzy Becs Challenge for July

with the theme being.....


"ANYTHING GOES"


The winner of this months challenge will receive:

A MYSTERY PRIZE
(being a die or stamp)

Donated from Bizzy Becs Online Storea fabulous range of Various Stamps, Dies and Embellishments for all your crafty needs and wants. and must haves!


***********************

Here is this months gorgeous inspiration from our Design Team gals


Stamping bella..rubber stamp from the Tiny Townie Collection


***************************


Leanne Creatief Dies - Swirl Circle and Flowers
Frantic Stamper Dies - Scallop Border Dies (3)
Impressions Obsessions Dies - Butterfly Set
Impression Obsession Dies – Greeting Set
Also Used Pearls, Rhinestones and Liquid Pearls as well as comic pens on the stamp and ink on the flowers and butterflies.
The stamp is a Whimsy stamp - Sweet Blossom.


***************************


Lou


I have used...
Pre Order Penny Black Fairy Sweet
Corner Die similar to Wild Rose Corner flourish


**********************


Mandy


Supplies used:
Stamping Bella -Nacho
Lawn Fawn-simple puffy cloud frames
impression Obsession- Greetings Top edges
Avery Elle Wonky Stitches


*****************************


Supplies Used:


*****************************


 (used no 11) all are 40% off.
Vellum (available through Bec)


**********************


Avery Elle Die - Wonky Stitches
Taylored Expressions Die & Stamp Combo - Hoot Hoot Hooray
MFT Die - Heart Stax


****************


HOW TO JOIN BIZZY BEC'S CHALLENGES...
 Here at Bizzy Bec's Challenges you are more than Welcome to Enter as many of your card creations that you like into our challenges,

 BUT..... We do have a few " RULES" we would like you to follow please......
 1. "Your card must not be entered into any more then 5  challenges"

 2.You must add your link in Mr.Linky 

3. You MUST add a link to your **direct blog post*** .

4. You must have a link back to the challenge blog in your post mentioning Bizzy Bec's Challenge.

5. PLEASE DO NOT link your entry to an old card, your entry must be new. "Unfortunately those entries that do not follow the RULES will be ineligible for the prize".
 

Bye for now...Bec, Annie, Carol, Jackie,  Jennie,  Karen, Lou,  Mandy  and Shaz.


Monday, July 4, 2016

June Challenge Winner .....

 June Anything Goes Challenge

                                       Bizzy Becs would like to congratulate:

                                             #5   Scoobysue


"Your card is so very pretty.  We just love all the elements you chose to create your Baby Shower Card, and  beautiful layering.  Your elephants are so adorable."


Congratulations 
you have won

A MYSTERY STAMP OR DIE

donated from Bizzy Becs Online Store
fabulous range of Various Stamps, Dies and Embellishments for all your crafty needs and wants.

We are sure you will have lots of crafty fun creating with your  prize....
**** please contact Bec  HERE to claim your prize and don't forget to grab your Winners Badge from the sidebar to display proudly on your blog. ****

OUR TOP 3 June Awards go to :

  # 17  Lovely Linda
#26  Jenny H
#30  Elana V


These are listed in numerical order  and all have been chosen using Random Org. We'd like to congratulate these amazing entries - outstanding creations everyone....please grab your Top 3 badge from the sidebar.

Don't forget to come back here tomorrow to see the NEW CHALLENGE and fabulous Inspiration from the wonderful Design Team Girls.
Cheers for now.....
 Bizzy Bec’s DT team.