Showing posts with label distress ink. Show all posts

Friday, September 15, 2017

Watercoloured Distress inks Spellbinders Elegant Ovals

Hi there everyone, Shaz here with a another tutorial on watercolouring, with distress inks.
The best way to colour this fine lined image, was with Distress inks watercolours - no detail is lost! Plus they blend beautifully.
Smooched
Distress ink on white piece of laminated cardstock, or use a stamping block, with white paper under it so you can see colours.
U
sed two mauve/ purple, and three green with blue. DI Blue Denim was used on both purple and green for shadows.
So here is the completed image .. this was for a very special friend"s birthday. Also lightly inked whilst the die cut still in Stitched Oval die with Distress inks in two greens, Peeled Paint, and Pine Needles. Cottage Cutz Stitched ovals  fit really well the largest of the Spellbinder Elegant Ovals.
I shaped the flowers as love the 3D look, although it doesn't really show that clearly - see here to show I do it. I did this with a single coloured layer.. a cheat's way :D
Completed card. All dies, etc, used listed below.

Items Used:
 Spellbinder Elegant Ovals
Our Daily Bread Beautiful Border Dies.
(Available previously with Bec before, so check availability).
Distress inks
Dies on Small labels:
Greeting is a disc. Our Daily Bread Greeting set, and Cuttlebug disc. Olivia Alphabet set for numbers.
Now don't forget to pop over  HERE at Bizzy Bec's and check out the other DT gorgeous creations, and please do join in ANYTHING GOES SEPTEMBER CHALLENGE - to win that prize.
Pop by Bec's store, too, for her great prices!

A big thank YOU, also if you take the time to leave a comment,
 .. you are very much appreciated! 
Shaz in Oz.x

Tuesday, August 15, 2017

Distress Inks + Sizzix Thinlits - Mixed Media #2

Hi there friends! Shaz here -  with another DT post for Bizzy Bec's Online craft store.
Here's a peek...
 
Items used - all are Pre-order
Distress Inks-

Mustard Seed, Fossilized Amber, Dried Marigold, Cracked Pistachio, Fired Brick

 
 Tested die combination on scrap cardstock before launching into good cardstock, to get position and size. Then marked it on the main card piece with pencil, and rubbed out later.
Using the Distress inks as listed above, I smooched them generously over the water colour cardstock do more than you think you'll need as I had to re-ink it. Then spritz the back of paper with water so it stays flat while you add water and glimmer or shimmer mist to top of ink. Allow to dry. Added spatters of ink to top card die cut; assembled card as below..
Layering up hugs die three pieces with double sided tape, used my usual system of adding layers while still in base sheet.. to keep it all in place.

Finished card -  pop it up on foam tape, added pearls to compliment the shimmery card stock on base. More details on my blog post.
Now don't forget to pop over  HERE at Bizzy Bec's and check out the other DT gorgeous creations, and please do join in ANYTHING GOES AUGUST CHALLENGE - to win that prize.
Pop by Bec's store, too, for her great prices!

Shaz in Oz.x

Saturday, July 15, 2017

Gilded Watercolour Distress Ink with Dies

Hi there friends. I saw this tissue watercolour method with crumpled and embossed highlights, and was looking for something inky with which to back this card. Wow, is it fun!!
Here's a wee peek.
First of all, use some ordinary tissue paper, mine was bit imperfect, second hand, from a present received who knows when. 😉
1. Select inks ( you can use most sort, but water-based blend best), used some Distress Inks - from Bec - made varying sheets as you can see.
  (Current card used mini DI Dried Marigold, Abandoned Coral, Fossilized Amber, Fired Brick.) 
2. Smoosh inks randomly on blending mat.
3. Then spritz inks with water, layer gently the tissue paper over the inks. Once coloured lift **carefully (it IS fragile at this stage) put on paper towel, or in my case, on junk mail!! the tissue dries well on it, once dry it lifts up easily.
 This method is really effective economical watercolour, especially if learning the technique. The card I made used the next "scrunched-it-up" step, also.
4.  For this, scrunch up the dried tissue paper then glue it to some card, as attaching press to emphasise the raised areas of scrunching. Allow to dry.
5. Use on finished sheet the embossing anti static pad. Cover well, then smooth (lightly and evenly) over Versamark ink pad to catch crinkle highlights. Sprinkle  Gold Embossing Powder and heat emboss. 
Attach to card base, you can see gorgeous gold highlights best on this photo below.
 6. Next comes Die cutting. I've used Sue Wilson Thank You Die
Spellbinders Dies used is Heirloom Legacy 5" x 7" die ( I bought mine from Bec, so it might be ordered from Bec, upon request)
To layer Die cuts and to see how to do this easily, see this post here.
 
Here is completed card, assembled, LOVE the intricacy of the Sue Wilson word die, superb quality and detail!
This technique is fun, will be revisiting it!! Hope you enjoy it too.

  Now don't forget to pop over  HERE at Bizzy Bec's and check out the other DT gorgeous creations, and please do join in the ANYTHING GOES July CHALLENGE - to win that prize.
Pop by Bec's store, too, for her great bargain prices
 
 
Thanks so much every one for popping over for a peek and chat! Lot more details found on my blog post here.
Shaz in Oz.x

Thursday, June 15, 2017

Darkroom Door Sail Away + WaterColour Distress

Hi there everyone, Shaz here! 
Back with another card with the wonderful Darkroom Door set - Sail away!
First a peek, then to the how to!

I gathered up sea coloured Distress Inks, as shown below + links at bottom. 
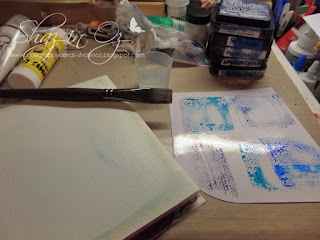
 Added inks to white coated mat (plastic coated lid from takeaway). Laid down a generous layer of water on watercolor block, then randomly added colours with large brush and water till happy. Did need to add more ink to palette before finishing.
Stamped on scraps two images with my favourite stamping ink Black Onyx Versafine, heat embossed with clear embossing powder.
Completed watercolour piece now dry.. as you can see colours very random, cut to fit a 5 x 7' base for card.
With two stamped images, inked with similar colours as used above, also DI Fossilized Amber from moon reflection.Ovals used to cut out window, added die cut frame, shaping it a little, adding mounting tape. Used largest and 3rd largest for die frame.
 Supplies used:
*All are Pre-order
* Darkroom Door Sail Away Stamp set.
* Lawn Fawn So Much to say ... birthday greeting.
* Distress inks 
Broken China, Peacock Feathers, Faded Jeans,  Salty Ocean, Chipped Sapphire.
.
(if you see something that is not listed in store, then ask Bec via email to see if she can order it in for you! )
Thanks for popping over, especially a big thank you if you say hi to let me know you've been by!

 Oh and dont forget to  join in the Bizzy Bec's Anything Goes challenge for June HERE..  someone has to win that prize.
 Shaz in Oz.x
PS more details on my blog post here too..

Monday, May 15, 2017

Retiform Stamping Technique - Darkroom Door Sail Away

Hi there everyone, Shaz here!
 I've found new stamping technique, and just had to try - it's called Retiform Stamping.
No idea what Retiform is??? Neither did I!:D
It's great for masculine or feminine cards I've found. Made a Pinterest page on Retiform Technique - over here, 50+ pins...
 Definition of retiform, by Webster: " composed of crossing lines and interstices : reticular, netlike; ... etc... "
Technique can be simple as many are or more complicated as I decided on.
Left is the Darkroom Door Sail Away Stamp set, perfect for this technique.
(What a grand stamp set - see it HERE! at Bec's excellent prices).
 Some basic tips, I thought of:
 *have nice contrasting colour choice, this makes or breaks it. 
* make defined intersecting lines that softly blend out. 
* when stamping images, think about placement and avoid empty space. Have them looking as if they're popping out of intersecting lines, to give more natural look (you'll see what I mean when we come to that). 😉
Template for centre, getting ready to ink centre, staring from edges used thee Distress Inks - Faded Jeans, Stormy Sky, Mermaid Lagoon.
Masked off portions and inked them up in alternating shades. Used Antique Linen, Fossilized amber, Frayed Burlap, with bit of gold glitz, for yellow shades..
Adding Masks (post-it notes) for image stamping, using smaller and larger stamps from DD Sail Away set, plus DD splatter.
Finished Retiform. The white mark is actually a shine not white area. Shine is from tape which was not re-positionable :( am no longer using it for that. I have added matte medium glue to the residue it left and it is now matte and fine :D
Card - take 1 above,  however wanted to re-do the central image!
Card Take 2 you can see below. Partly I like the first card, but felt too little contrast with central image, hence remake of it! It is what it is now :D

Lawn Fawn So Much to say ... birthday greeting.
Distress inks -
Antique Linen, Fossilized amber, Frayed Burlap,
Faded Jeans, Stormy Sky, Mermaid Lagoon, Salty Ocean.
Ranger Archival Ink for navy stamping -Cobalt  and Sepia.
(if you see something that is not listed in store, then ask Bec via email to see if she can order it in for you! )

Thanks for popping over, especially a big thank you if you say hi to let me know you've been by!

 Oh and dont forget to  join in the Bizzy Bec's Anything Goes challenge for May HERE..  someone has to win that prize.

Wednesday, February 15, 2017

Bokeh Technique With Die cutting

 Hi everyone, 
Just popping in to share my mid month DT post for Bizzy Bec's...
Okay here is a sneak peek of my card... as you can see it is inky, using the Bokeh technique, plus loads of die cutting.
So here it's getting inky. Cut a sheet of Neenah heavyweight white cardboard (it blends really well). Used Distress inks (Mustard Seed, Mowed Lawn, Pine Needles and Peeled Paint), with some memento inks - Bamboo Shoots + Pear Tart.
One piece was inked "ombre" with dusters, other was smooshed.
** I did do more inking on both after taking this photo.
Die cutting the bottom of the inked ombre piece.
TIP
:
1.keep die cut a base in fun foam piece.
2. squeeze
Tombow glue over fun foam die cut (whilst still in foam base).
3. Let it dry to get tacky, then you have time to position the top die cut well before adhering. Tombow becomes re-positionable after drying some, I guess this applies to all tacky glues.

  Double layered *the Memory Box Flower branch, *Pinpoint Circle frame + fun foam on Music die.
The Bokeh part: 1.cut different sized circle dies for a template to ink around.
2. Use sponge applicator and chalk ink and various layers of circles assorted sizes.
3.You need base ink utterly dry avoiding not have greenish circles, ie no ink transfer. 4. It's better to dry chalk ink off as you go, so circles keep more distinctive.

This piece is the smooshed ink sheet with circles on it, will be used later. 
Completed card. This is a partial CASE of this card on Pinterest - from Splitcoast Stampers, but couldn't find person's name.
Products used:
and Pre-order Memento inks.
Thanks so very much for each of you who've popped over..
.... and please do say hi to let me know that you've been by!
Shaz in Oz.x 

Sunday, January 15, 2017

Darkroom Door - Surfboards Photo Stamp Gatefold card

Hi there everyone, Shaz here it's the 15th, halfway through month, so that means a Design Team post. 😊
Today I'm sharing a step by step card with Darkroom Door Surfboard Photo Stamp.
 Here is peek of my card... loved the result.
As I planned on water colouring part, stamped about four images in mixture of waterproof Archival inks, Jet Black, Sepia, Cobalt. Stamped one in Cobalt, which used for main image, others were in mixture of them swiped over the stamp. Used deep blue image on sky + sand background. Used mixture of *Distress Ink pads, on the sky and sea, Salty Ocean, Denim Blue, Stormy sky. On sand used Antique Linen, Mustard seed+ a little Vintage photo. (* added Distress inks in photo - right front, to piece of white laminated card to colour with which to colour)
Intended to 3D the Surfboards, mostly surfboards have some sort of colour on it, but there are quite a few neutral ones too.These were calling for colour 😊
Added cut out Surfboards, shaped them, then glued. Front two were added on top of first lot. Once glue was dry, added glossy accents to the Surfboards, they looked like the real thing then.
I really loved this image, it was so much fun to play with it. To finish the image I dusted it lightly around the edges with DI Vintage Photo, to age the edge of card which was stark white.
Stamped the Happy Birthday with Lawn Fawn stamp Set -  "So much to say" on cream card in Onyx Black Versafine Pigment ink pad, and clear embossed. Hand cut a greeting banner and backed in black card.
Embossed a sheet cream, similar to greeting banner, with a favourite folder for male cards, Sizzix Dot Matrix embossing folder. Smooched it with Distress ink Antique Linen, I use this colour a lot. Then took a snippet of turquoise and embossed it with large embossing folder.Assembled card.

Well, that's it for today... dont forget to join in Bec's Anything Goes January challenge .. you might win the prize :D
 Shaz in Oz.x
PS more details on my blog post - here